The DIY Miniature House Build: A Step-by-Step Guide for Beginners
Building a DIY miniature house can be an incredibly rewarding and relaxing experience. Whether you're an experienced crafter or just discovering the world of miniature house kits, this guide will help you successfully complete your first project. In this post, we’ll walk you through the entire building process and share helpful tips and tricks to make everything run smoothly.
Choosing the Right Miniature House Kit
The first step in your DIY miniature house journey is selecting the right kit. If you're a beginner, choose a model that’s simple yet detailed enough to help you learn the basics. Make sure the kit includes clear instructions and all essential materials. A small garden house or tiny kitchen is often ideal for beginners.
Preparation Is Everything
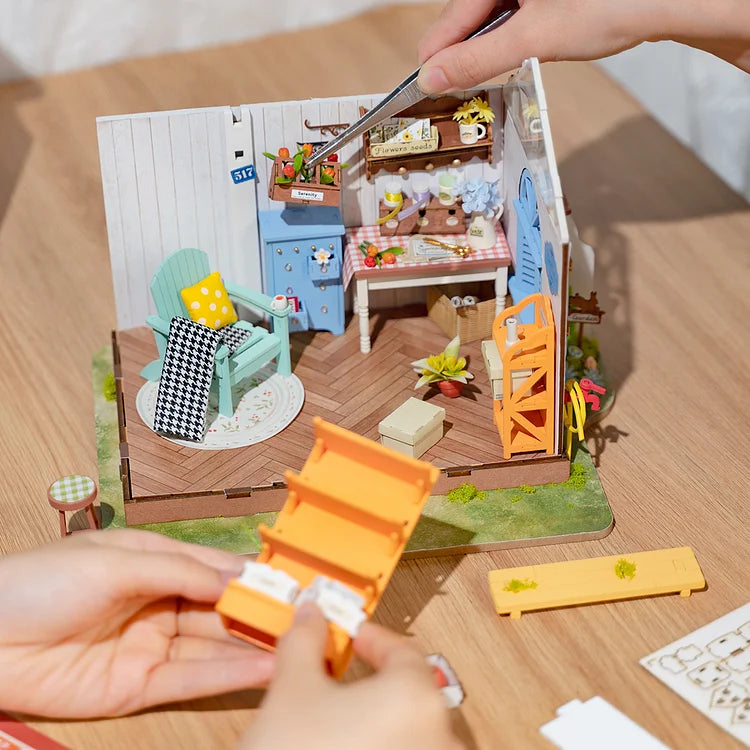
Before you start building, prepare all the parts and tools you’ll need. Lay out all components neatly and ensure your tools—glue, tweezers, scissors, cutting mat—are close at hand. A well-organized workspace makes the building process much easier and helps prevent frustration.
Understanding the Instructions
Take your time reading the step-by-step instructions. Many miniature house kits come with image-based guides, which are especially helpful for visual learners. Read each step carefully before assembling to avoid mistakes. Understanding the entire build process in advance will save time and nerves.
Starting the Build
Begin with the structure of your miniature house—usually the walls and frame. Follow the instructions closely and apply enough glue to keep everything stable. For more complex models, work in small stages and fully complete one section before moving on to the next.
Bringing the Details to Life
Once the structure is complete, the fun part begins—adding the details! This is where your creativity shines. Place furniture, décor pieces, and tiny accessories with care. These small details bring your miniature house to life. A magnifying glass can help you work more precisely.
Installing the Lighting
Many DIY miniature houses include lighting options. This step requires patience, but it’s absolutely worth it. Warm lighting adds charm, personality, and realism to your model. Take your time with the wiring and secure all components properly.
Patience Is Key
Building a miniature house takes patience and attention to detail. If you start feeling tired or frustrated, take a break. This hobby is meant to be enjoyable and calming—so move at your own pace and make sure every detail feels right.
Admire Your Finished Work
Once you’ve completed all steps, it’s time to admire your creation. Display your miniature house where it can shine. You’ll be surprised how much joy it brings—and this may just be the start of a new passion!
Conclusion
Building your first DIY miniature house is a wonderful way to express creativity and create something truly unique. With the right preparation, patience, and care, your project will be a complete success. Follow these steps and soon you’ll have a beautiful miniature home that impresses not only you, but also friends and family.
Share:
Tips & Solutions for a Successful Project